
You’re sitting with a couple of wooden beads in your hand, wondering: is this really possible? The answer is yes – and it’s easier than you think. Making your own dummy chain is no rocket science. It’s a quiet half hour where you create something your baby will touch every day. Something that smells like you, because you’ve held it between your fingers. And something that looks exactly how you want it to – not like a mass-produced item off a shelf.
In this guide, we’ll walk through step by step: what materials you need, which standards you should know about, how to personalise a dummy chain with a name – and which little mistakes to avoid at the start. By the end, you’ll have a chain in your hand that holds, is safe and looks like you’ve been making them forever.
Why make your own dummy chain?

You can buy a ready-made dummy chain in two minutes. But a handmade one has something you can’t buy: intention. You know exactly what’s in it. You’ve chosen the beads – the warm pastels, the little silicone heart, the letters with your baby’s name. You’ve tied the knots. And your baby feels this whole little story, even if they can’t put it into words.
Three good reasons to spell it out anyway:
- Personal. Colours, shape, name – everything suits your child. Also the perfect gift for a birth or christening.
- Safe. You know exactly which beads you’re using and whether they’ve been tested for harmful substances. No nasty surprises.
- Budget-friendly. A handmade dummy chain costs you between €4 and €8 in materials – not €15 in the shop.
What materials do you need?


Before you start crafting, lay everything within arm’s reach. That’s the difference between half an hour of joy and half an hour of hunting.
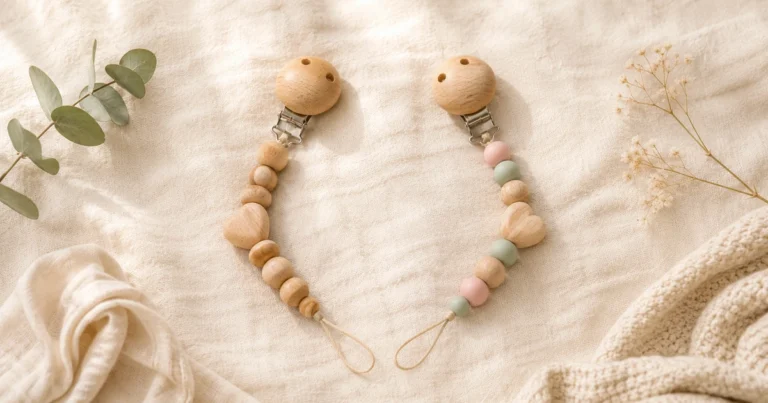
- Wooden beads – usually 8 to 15 pieces, diameter between 12 and 20 mm. Smooth-sanded, with no solvent-based varnish.
- Satin cord or nylon cord – sturdy, tear-resistant, approx. 35–40 cm long.
- Dummy clip in wood or metal – the clasp that attaches to clothing.
- Silicone adapter ring – the small ring at the end where the dummy is hooked.
- Optional: Letter beads for the name, a silicone motif bead (heart, star), a small wooden disc as a focal point.
- Tools: Scissors, possibly a lighter to seal the cord ends.
Pro Tip: Buy a couple of extra beads rather than too few. A dummy chain with 10 beads often looks better than one with 7 – and leftovers always find their way into the next teething toy anyway.
Safety first – EN 71 and DIN EN 12586


A dummy chain ends up in your baby’s mouth. Full stop. That’s why there are two standards you need to know before you start.
- EN 71-3 – the European toy safety standard for harmful substances. It regulates how much heavy metal (lead, cadmium, etc.) can leach from beads and varnishes. When buying materials, look for “tested to EN 71-3”.
- DIN EN 12586 – the standard specifically for dummy chains (dummy holders). It stipulates: maximum length 22 cm, measured between clip and the inside of the dummy ring. No loop that could strangle a baby.
This 22 cm isn’t a recommendation – it’s a safety limit. Make your chain shorter rather than longer. And: no elastic bands, no open loops, no small parts that could come loose.
Pro Tip: After finishing, give each bead a firm pull. If anything shifts, the knot is too loose. Better to tighten once more than not enough.
Make your own dummy chain – step by step


Allow about 20 to 30 minutes. No stress, no ambition. More like a cup of tea with your hands.
Step 1: Cut the cord
Cut a piece of satin cord of approx. 40 cm. That’s more than you need – but better to trim leftovers than run short.
Step 2: Seal the cord ends
Hold the ends briefly over a flame until they melt slightly and seal. This stops them fraying and helps them slide through the beads more easily. Do this definitely for nylon cord; for cotton it’s better to knot.
Step 3: First knot on the clip
Thread the cord through the eye of the wooden clip, double it over and tie a firm double knot. Pull tight – really tight. This knot holds the whole chain.
Step 4: Thread the first beads
Thread your beads in the order you’ve arranged them beforehand. Starting with larger wooden beads often looks better visually. Leave a space after the first 2–3 beads for the name highlight.
Step 5: Add letter beads (optional)
If you’re making a dummy chain with a name: thread the letters now, in name order. Add a small wooden disc or motif bead alongside – that frames the name nicely.
Step 6: Thread the remaining beads
The second half of the beads follows. Make sure the total length stays between 18 and maximum 22 cm – measured from the inside of the clip to the silicone ring.
Step 7: Attach the silicone ring
Thread the cord end through the silicone adapter ring, tie a double knot and pull it tight against the last bead. Check the length once more.
Step 8: Trim and secure the ends
Trim any excess cord to about 3 mm and seal the ends again briefly with the flame. Done. You’ve made a chain.
Tips for beginners
- Knots: Always double. Single knots come loose – and that’s not just annoying, it’s dangerous.
- Length: Prefer 18 cm to 22 cm. Shorter looks nicer and is safer.
- Letter beads: Pastels look softer on wood than bright colours. Try them before threading.
- Care: Wipe with a damp cloth, never in the dishwasher, never sterilise – that ruins the wood.
- Test fit: Before the final knot, do a dry run with everything. If anything shifts, reshuffle.
Common mistakes
- Made it too long. Anything over 22 cm breaches DIN EN 12586 – strangulation risk.
- Knots too loose. Beads slip, chain gets wobbly, at worst the dummy comes off.
- Wrong beads. Varnished craft beads from the hobby shop aren’t necessarily EN 71-3 tested. Use baby beads explicitly.
- Cord too thin. Under 1.5 mm it snaps easily. Use sturdy satin or nylon cord at least 1.5 mm thick.
- No test pull. Before gifting, give the clip and silicone ring a firm tug. Does it hold? Good. Anything loose? Retie it.
Dummy chain with a name – how to personalise it

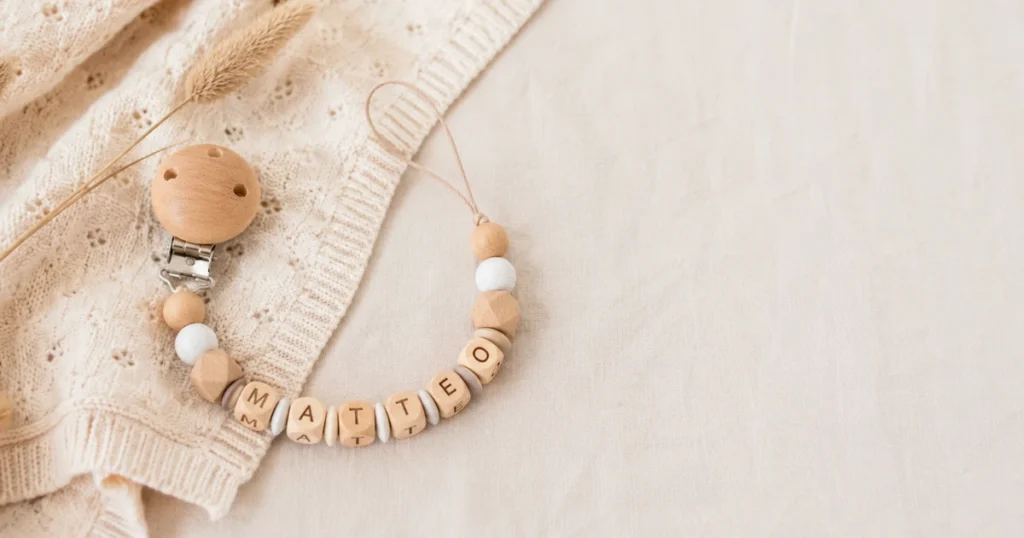
A dummy chain with a name is the most popular new baby gift – and for good reason: it’s one of a kind, and the name turns a product into a little declaration of love.
Here’s how:
- Lay the name out on the table before threading. Sort the letters in the right order.
- Plan to put a wooden disc or motif bead on either side of the name as a frame.
- Thread the name after the first 2–3 wooden beads – not right at the clip. That way it reads better when the chain hangs.
- Watch the letter orientation: thread them all the same way, or the name will be upside down later.
Pro Tip: With very long names (8+ letters) the chain gets long fast. Better to use a nickname or initials plus a motif bead – often looks even nicer.
Care and cleaning
Wood is a living material. It shouldn’t soak in water and has no place in the dishwasher. Simply wipe the chain with a damp cloth – if needed, with a drop of mild baby soap water. Then dry thoroughly, preferably in the air, not on the radiator.
Check the chain regularly: are the knots holding? Is a bead cracked? Replace at the slightest damage – always.

Don’t have the patience to craft?
We understand. Sometimes time’s tight, the baby’s fussy, and the dummy keeps hitting the floor. Sometimes a ready-made chain is your only salvation.
Ready to get started right away?
If you need materials – wooden beads, cord, clips, letter beads – check out our craft kits. Everything pre-sorted, everything tested, all German quality.
FAQ – frequently asked questions
How long can a homemade dummy chain be?
Maximum 22 cm, measured from the clip to the inside of the dummy ring (DIN EN 12586). We recommend 18–20 cm for optimal wearing comfort.

Which beads can I use?
Only beads tested for harmful substances to EN 71-3. Wood unvarnished or treated with food-safe plant oil, silicone in food-safe quality (BPA-free).
From what age is a dummy chain suitable?
Suitable from birth, as long as the baby is supervised. Never keep it on while sleeping. The chain belongs on daytime clothing, not in bed.
How do I clean a wooden dummy chain?
Wipe with a damp cloth. No hot water, no dishwasher, no steriliser. That damages the wood and roughens the surface.
Can I use letter beads from a craft shop?
Only if they’re explicitly marked as baby beads to EN 71-3. Classic craft letter beads often aren’t mouth-safe – steer clear.
Have fun crafting. And when you’re done: do show us your chain on Instagram under #Kiki-Ena – we’ll share the loveliest ones on our page.