
Nursery project · Nursery & school
Sensory Corner with Millhouse Furniture and Kiki-Ena Beads
A permanent sensory corner built from Millhouse wall elements, complemented with sparkly Kiki-Ena motif beads to touch and explore.
- Age1-6 years
- Difficultymedium
- Timeapprox. 90 minutes
- Materials approx.740-760 €
What you need
-
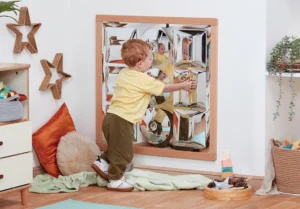
1 piece · Sensory wall mirror as the base element of the sensory corner
Millhouse PT1288 Sensory Wall Mirror
429,00 € in stock · Item no. PT1288 -
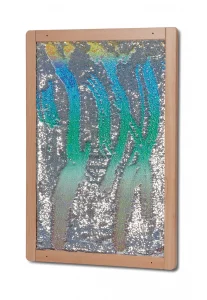 1 piece · Sequin wall with sensory surface for touching and observing
Millhouse PT1287 Sequin Wall with Sensory Surface
305,00 € in stock · Item no. PT1287 -
 10 pieces · Star sparkle motif beads to fill small feely bags
Sparkle Star Motif Bead
1,19 € in stock · Item no. M0037
Step by step
- Mount the wall mirror and sequin wall next to each other at children's height
- Fill small fabric bags with the sparkly motif beads and seal them
- Attach the feely bags on a cord next to the sensory wall
- Mark off the area with a non-slip mat
- Check regularly that the bags and wall elements are firmly fixed
Safety first
- Use beads only in firmly sewn or glued feely bags, never loose and accessible
- Mount the wall elements securely to a load-bearing wall according to the instructions
- For children under 3 (under-3s) use only under direct supervision
Variations
- Add the sensory dome wall mirror (PT1289) instead of the sequin wall for a second location
- Refill the feely bags seasonally with different Kiki-Ena motif beads
Our tips
- Institutions can order on invoice, which makes it easier to charge larger furniture items to the nursery budget
- Several sensory corners work well spread across the whole setting, for example in the toddler room and the main group room
Frequently asked questions
Is the sensory corner also suitable for the under-3s room?
Yes, the elements are suitable for the under-3s area, but small feely bags should only be offered there under supervision.
How do we mount the wall elements?
Both elements are screwed firmly to the wall following the enclosed mounting instructions.