
Nursery project · Nursery & school
Indoor Touch and Senses Trail
An indoor senses trail with Eduplay feely cards and a Millhouse sensory wall for touching, comparing and describing.
- Age2-6 years
- Difficultyeasy
- Timeapprox. 30 minutes
- Materials approx.490-500 €
What you need
-
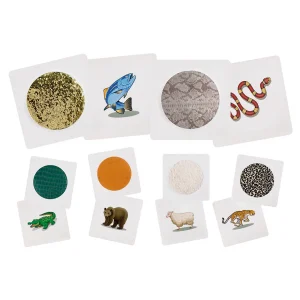
1 set · Feely cards set for comparing different surfaces
Touch Cards 6-Piece Set
63,90 € in stock · Item no. 120742 -
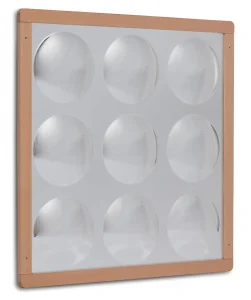 1 piece · Sensory dome wall mirror as a visual and tactile station
Millhouse PT1289 Sensory Dome Wall Mirror
429,00 € in stock · Item no. PT1289
Step by step
- Mount the dome wall mirror at children's height in a hallway or group room
- Place the feely cards ready in a small box next to it
- Let children take turns feeling and describing surfaces
- Collect the experiences and words together (rough, soft, smooth, cold)
- Add new natural materials to the trail regularly
Safety first
- Check feely cards for damaged edges or loose materials before handing them out
- Mount wall elements securely so they cannot shift or fall while being touched
- Watch for swallowable small parts with children under 3 (under-3s)
Variations
- Add self-collected natural materials (bark, moss, stones) to the feely cards
- Combine the sensory wall with the sensory corner made of Millhouse furniture
Our tips
- Institutions can order on invoice, which makes it easy to add further touch stations
- The trail works well as a calm transition station between two activities
Frequently asked questions
How do we clean the feely cards?
The cards can be wiped with a slightly damp cloth; heavy moisture should be avoided.
Can the senses trail also be set up outdoors?
The wall elements are primarily designed for indoor use; for permanent outdoor exposure we recommend a covered area.